Overview
What is Mocha and why does it exist?
Mocha is a Compilers teaching and learning tool. Compilers is a notoriously complex subject, however much of the topic utilizes graphs and tables which creates a great opportunity for visualization. There are currently not many applications available that offer help in visualizing topics in Compilers. This is where Mocha comes in. This website will serve as a guide on how to use Mocha. In the following sections I will give a brief overview of the applications features.
Features
- Import Grammar
- Export Grammar
- Generating FIRST, FOLLOW, and PREDICT Sets
- Generating LL(1) Parse Table
- Generating LR(0) Automaton (NFA)
- Generating LR(0) Automaton (DFA) with Parsing Table (Action and Goto Tables)
- Generating SLR(1) Automaton with Parsing Table
- Generating LR(1) Automaton with Parsing Table
- Generating LALR(1) Automaton with Parsing Table
Basic Functionality and Page Layouts
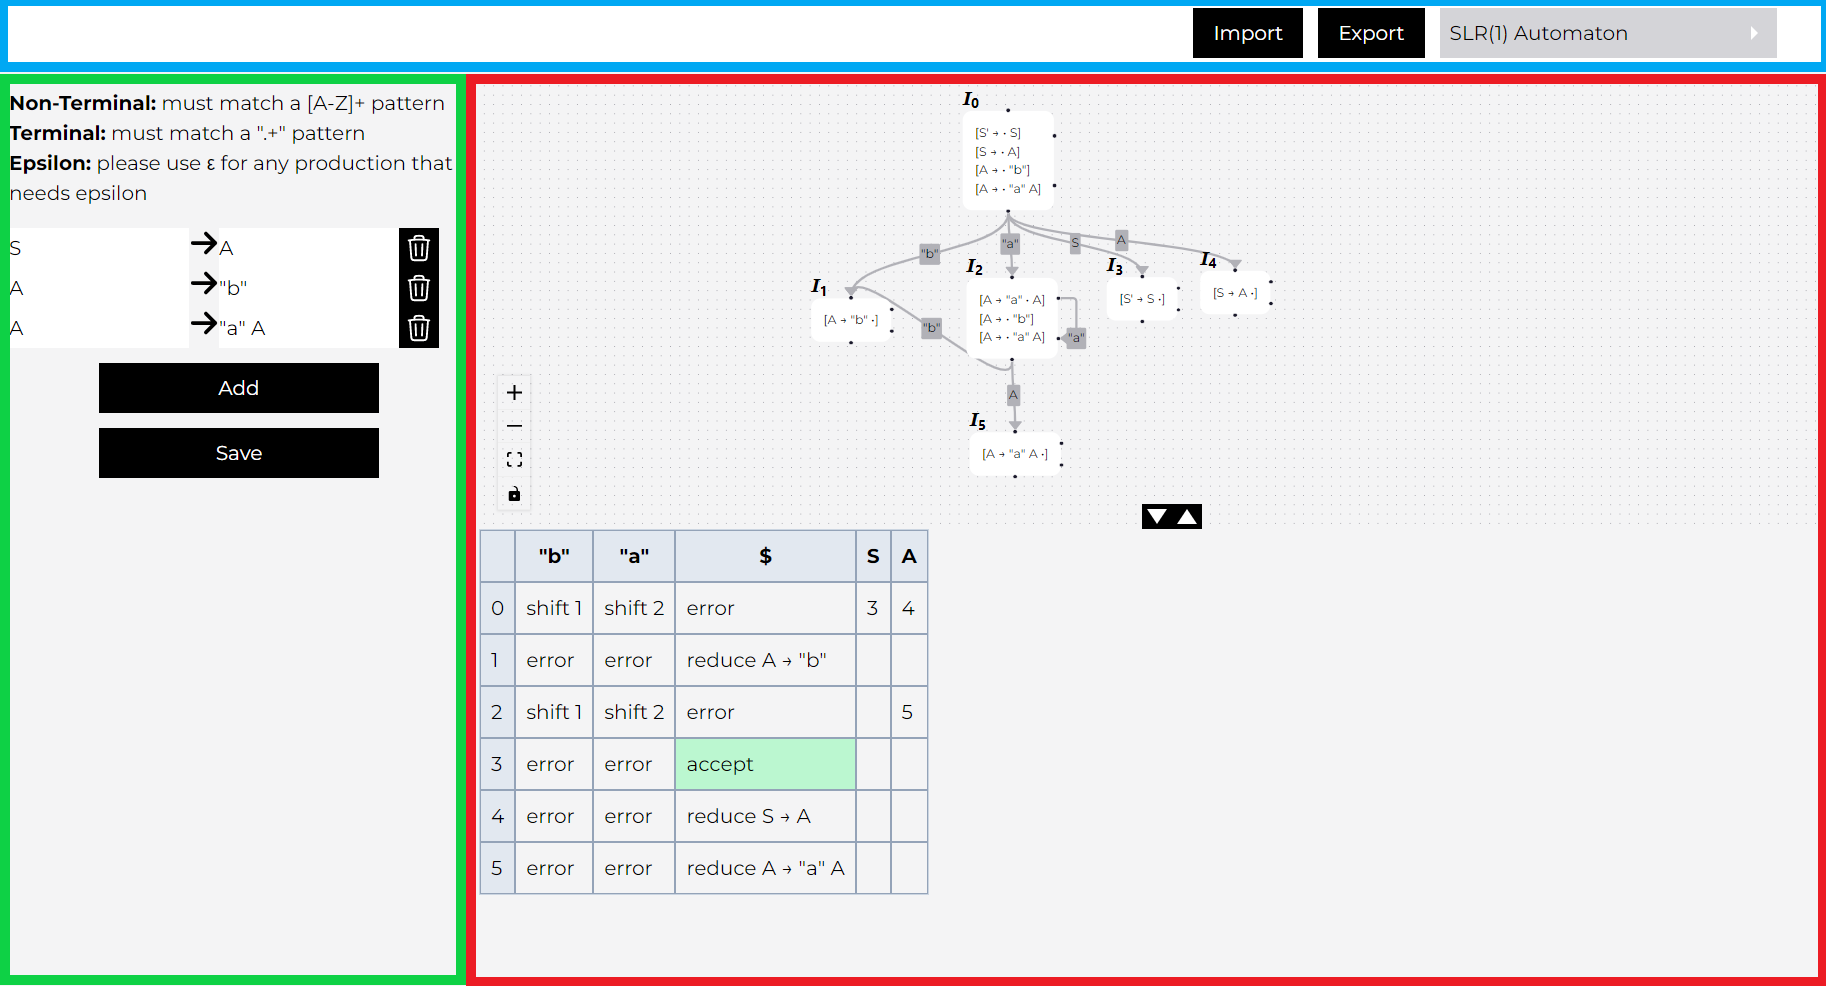
There are three main sections that make up the application, the Main Navigation Bar (in blue), the Grammar Input Side Panel (in green), and the Results Panel (in red). Each page of the application will consists of these three elements. The Main Navigation Bar and the Grammar Input Side Panel will remain the same throughout every page. The Results Panel will vary in what it displays depending on which page you are on. The Results Panel will either contain only tables, only a graph, or both.
Main Navigation Bar and Navigating Pages
The Main Navigation Bar contains three elements, the Import Button, the Export Button, and the Page Select element. The Import Button (in blue) will allow you to import a grammar from a text file. The Export Button (in green) will allow you to download the current grammar as a text file. The Page Select (in red) element shows the current page and will allow you to navigate between pages.

Clicking on the Page Select element will present you with all of the available pages and clicking on a page option will take you to that page.

Grammar Input Side Panel
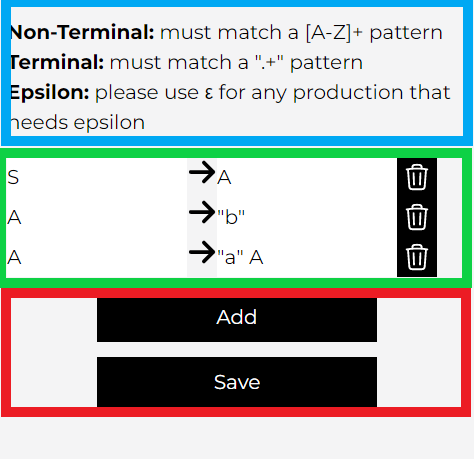
The Grammar Input Side Panel allows you to change the current grammar being used throughout the application. The panel consists of three main sections, the instructions (in blue), the production inputs (in green), and control buttons (in red).
Production Inputs
The Production Inputs were designed to be intuitive. There are three elements of each input, the left hand side (in blue), the right hand side (in green), and the delete button (in red). The left hand side can only contain a non-terminal which must consist of one or more uppercase letters. The right hand side will take any combination of non-terminals and terminals or an epsilon. The right hand side input is designed to allow multiple right hand sides separated by a | allowing you to have a more concise grammar. The grammar input will highlight red if there is a syntax error. For any particular right hand side there must be a space in between non-terminals and terminals. As indicated by the instructions section terminals can consist of any character but the terminal must be wrapped in quotes.

If you cannot find the error in a right hand side input, make sure that there is at least one space between each term.
Grammar Control Buttons
There are two buttons in the side panel that allow you to modify the grammar, the Add button (in blue) lets you add another production to the grammar, and the Save button (in green) lets you save the grammar. The result panel will not be updated with the grammar changes until you click the save button. If there is an error in your grammar a modal explaining the error will popup when you press the save button. The error will indicate the rule that is causing the error.

If you do not see your grammar changes reflected in the results panel make sure to click the save button.
Results Panel
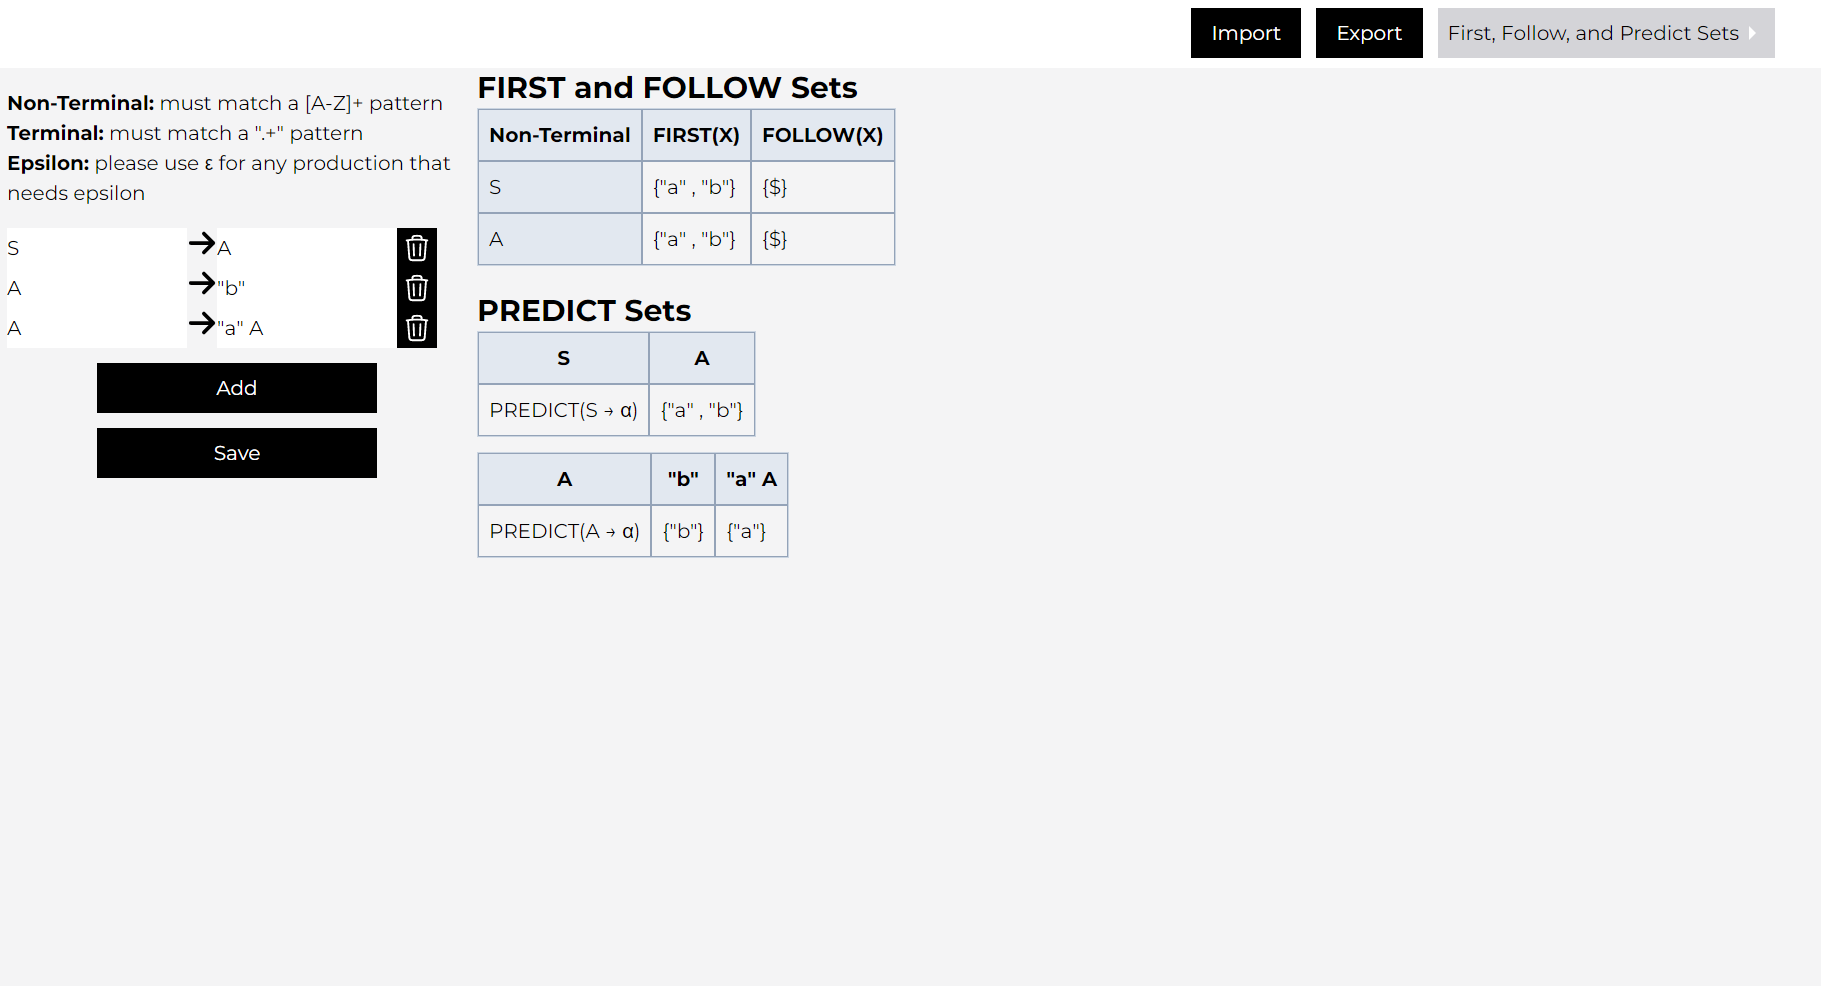
There are three different variations of the Results Panel that will appear in the application. The first variation is that only tables will be shown (seen below). The following pages will only have tables for the Results Panel:
- First, Follow, and Predict Sets
- LL(1) Parse Table
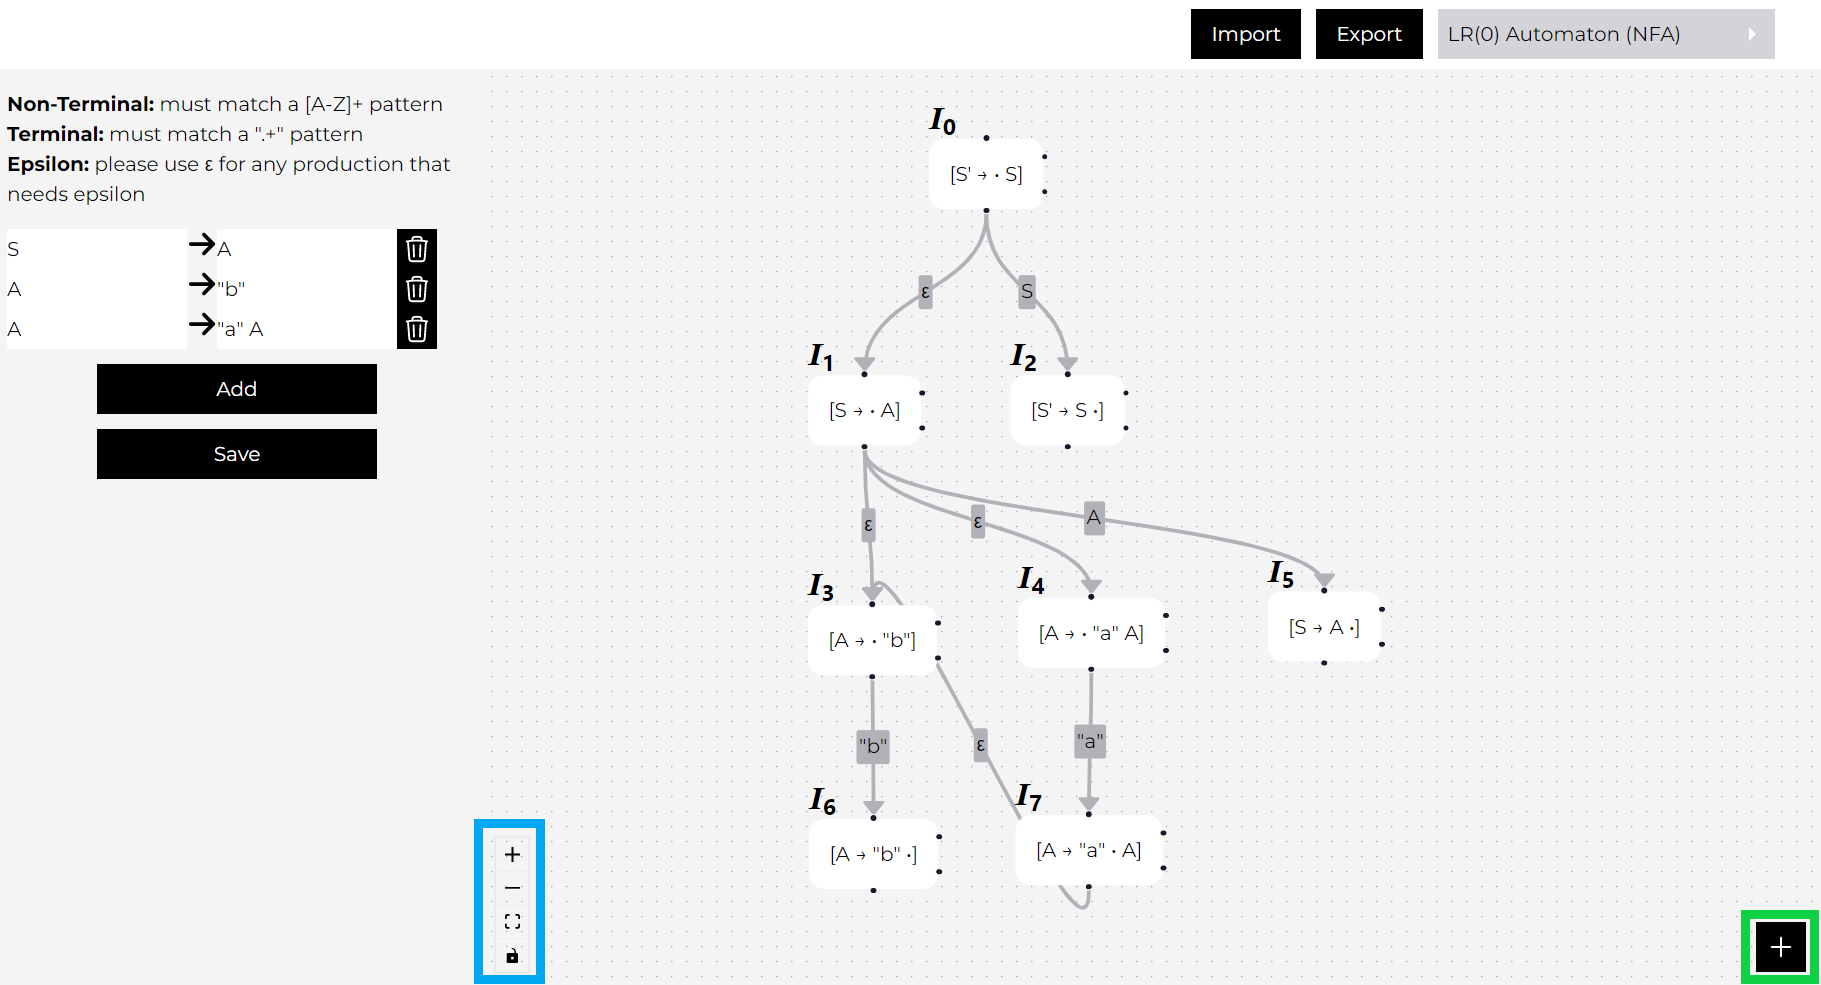
The second variation is only a graph being shown. This will only happen for the LR(0) Automaton (NFA) page. The graph has a couple of features that I want to point out. There is a toolbar in the bottom left corner of the graph (in blue). The plus button in the toolbar will zoom in. The minus button in the toolbar will zoom out. The button with four corners of a square, will attempt to fit the graph in the screen and will show it centered. The lock button will lock the nodes so that you can move around and look at the graph without accidentally moving a node. The button with a plus in the right corner of the graph (in green) is the add button. The add button will appear as long as there is more nodes or edges to add to the graph. Lastly, you are able to move any node in the graph and when you click on any edge it will highlight it.
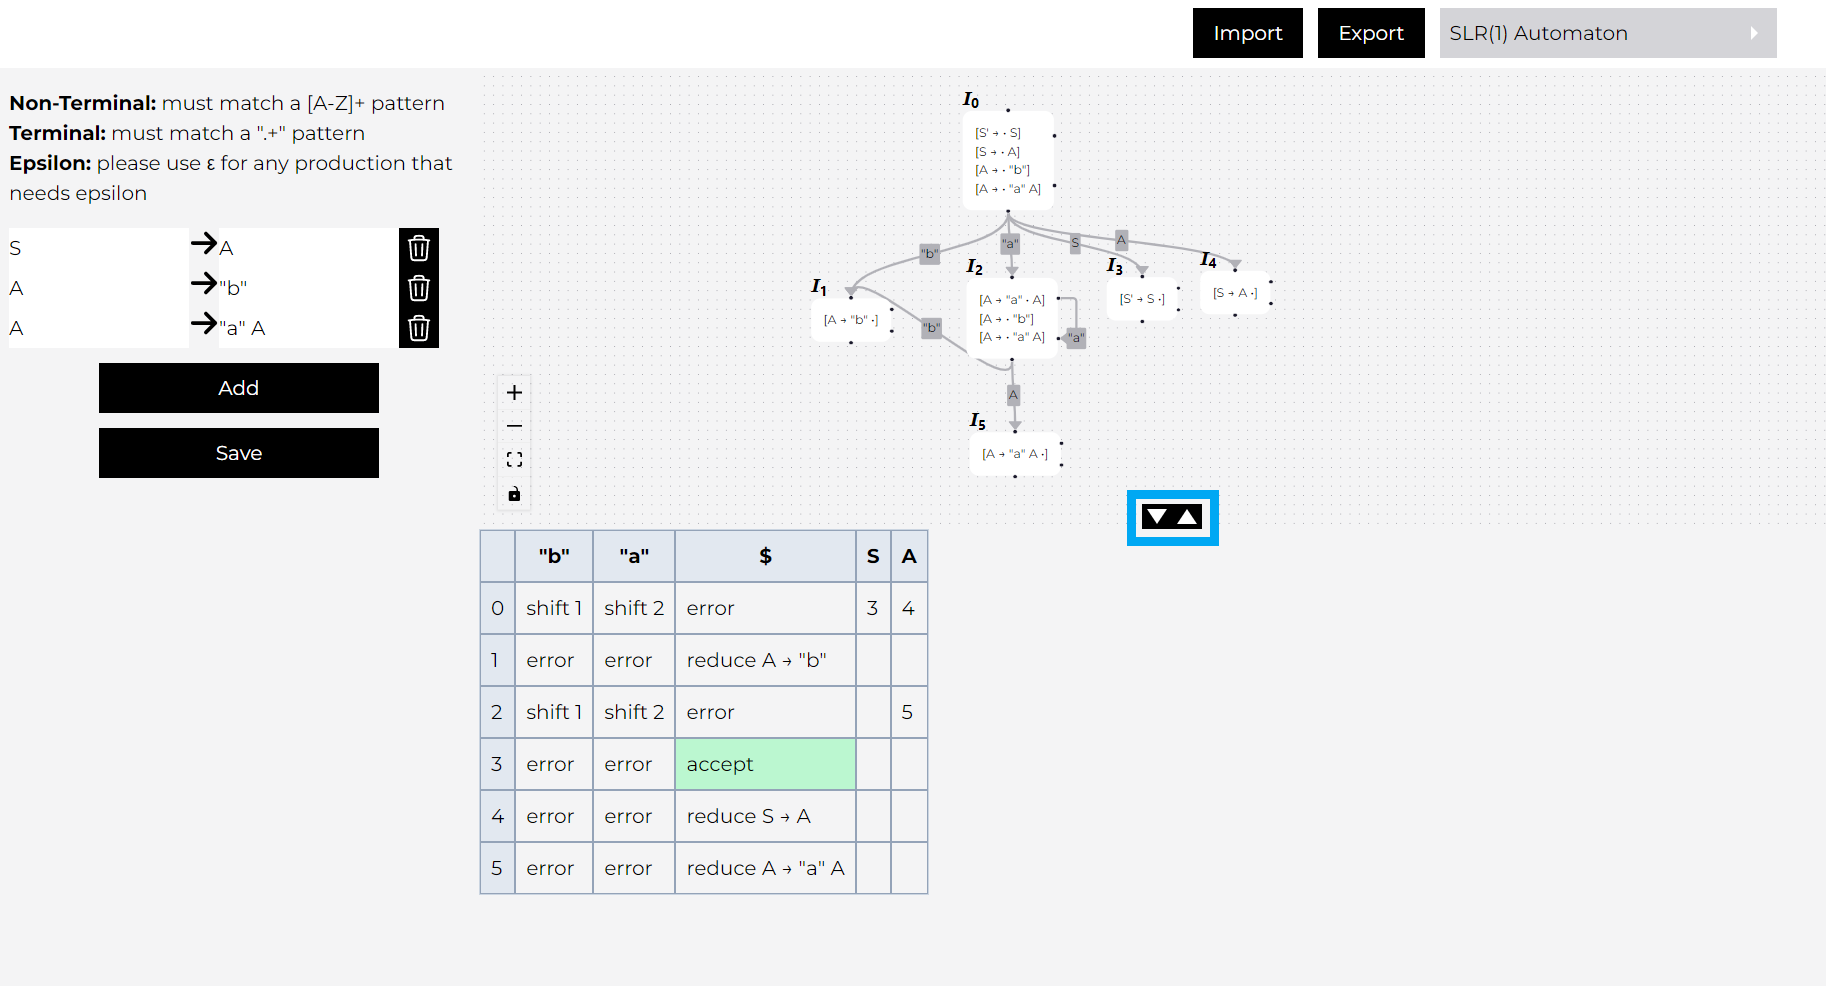
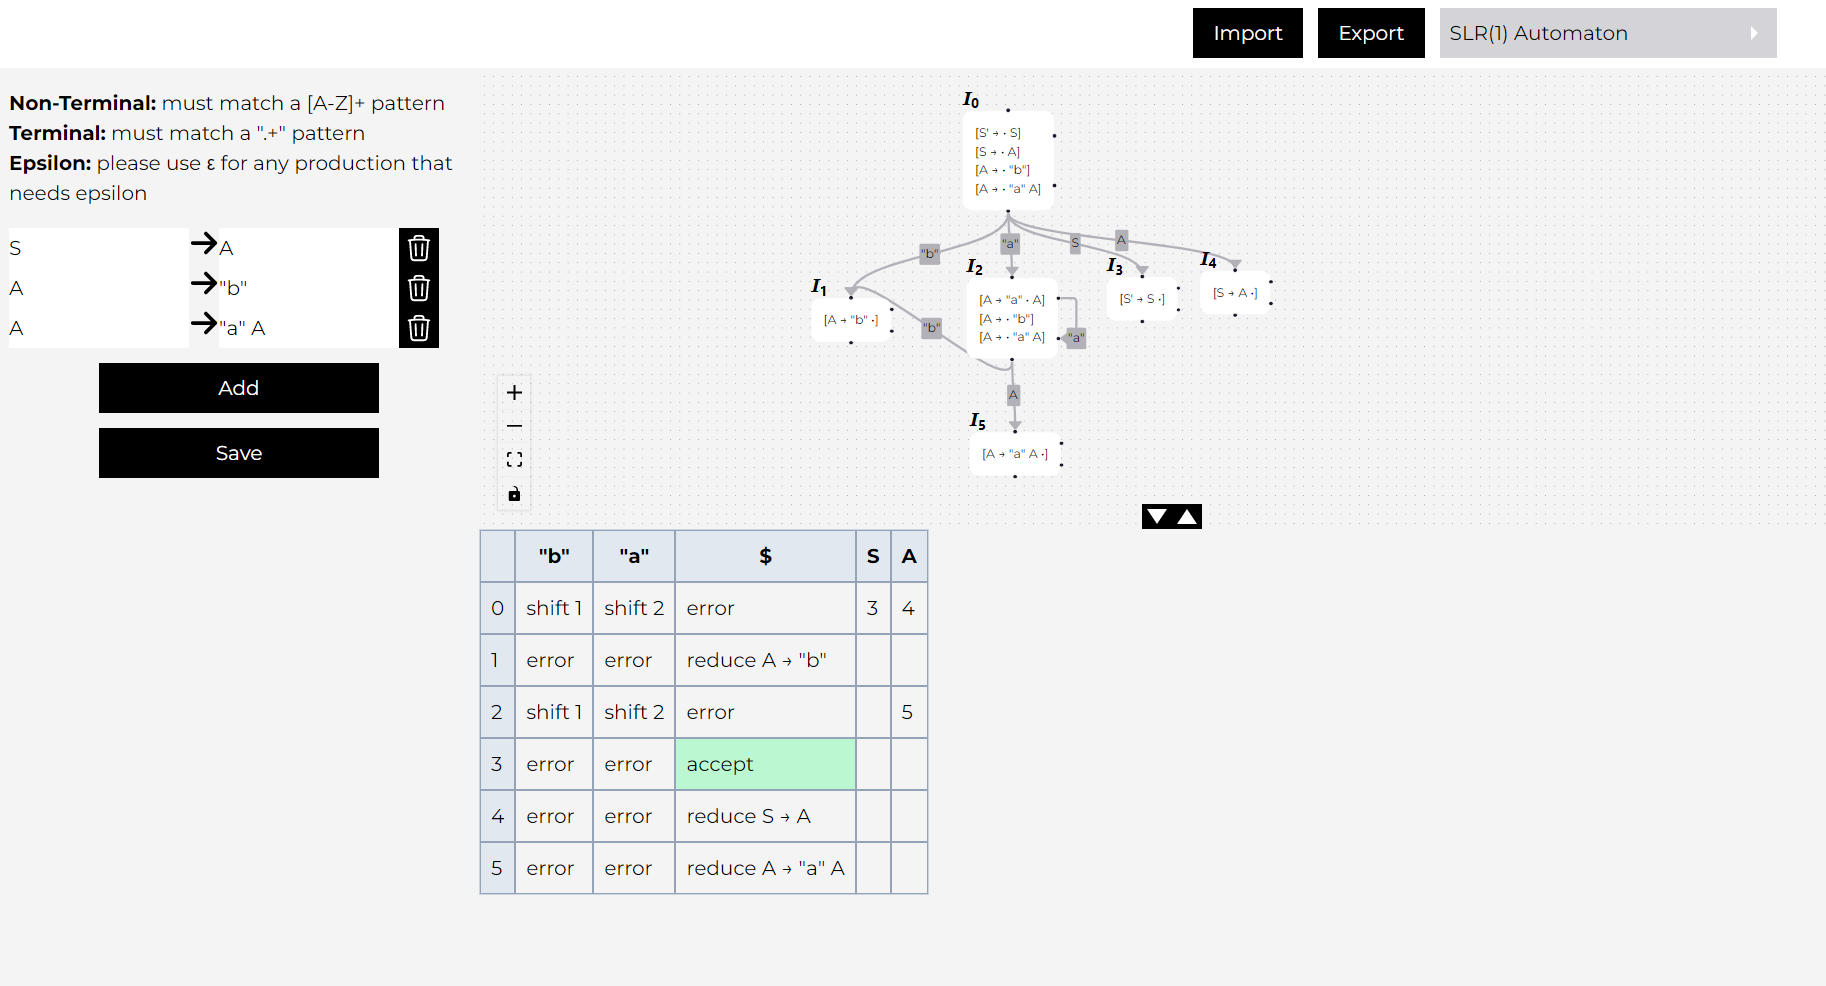
The last variation is when a graph and a table is shown. The results panel will be split with a graph on top and a table shown on bottom. All the functionality of the graph is the same as when only a graph is shown, however there is one unique feature added for these screens. There is a set of buttons in the middle of the screen between the graph and the table (in blue). This button allows you to adjust the height of the graph and table allowing you to see more of the graph or table depending on which is more important to you at the moment. This variation of the results panel is shown for the following pages:
- LR(0) Automaton (DFA)
- SLR(1) Automaton
- LR(1) Automaton
- LALR(1) Automaton